Tech packsclothink
Tech Pack Example: A Complete Hoodie Tech Pack, Page by Page
- Product development
- Startup brands
A blank tech pack tells you where the information goes. It doesn't tell you what to write.
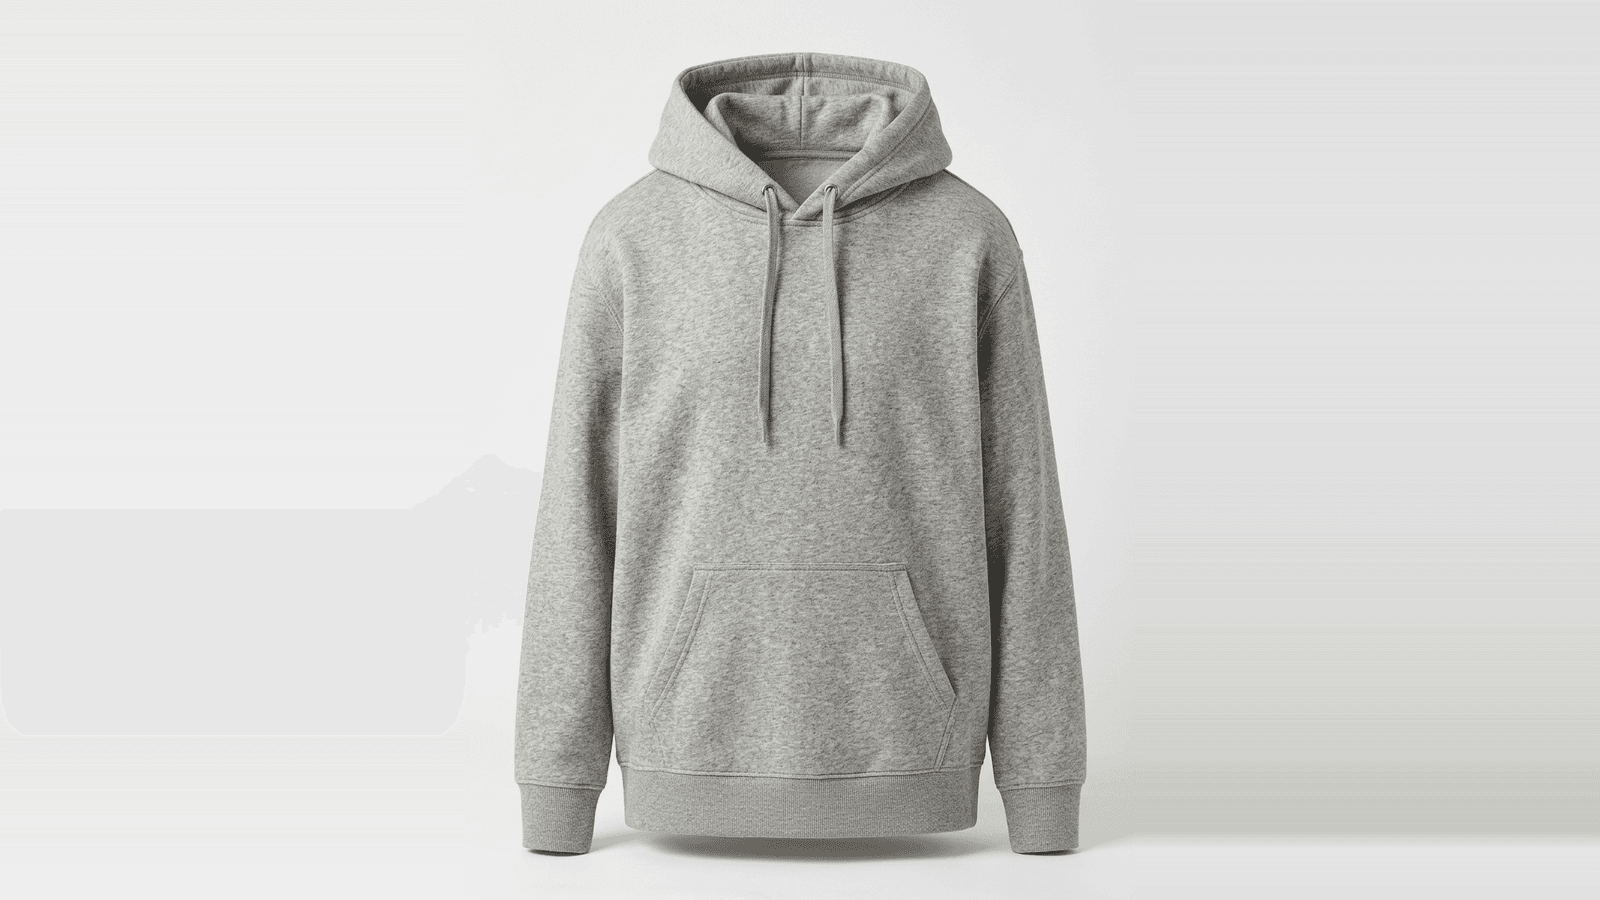
So we built a complete nine-page tech pack for a heather grey hoodie, with the measurements, fabrics, trims and construction details a factory needs to understand the design. This guide takes you through the actual document, page by page: what each page does, what the factory looks for on it, and what to check before you send it.
A professional-looking tech pack isn't much use if the instructions inside it are wrong.
The hoodie is an illustrative design, not a product on sale. The pack is a real clothink export at prototype stage: it hasn't been sampled yet, and the hoodie pictures are AI-generated mockups, not photographs.
Download the hoodie tech pack
The full nine-page PDF and the matching Excel workbook. Free, with no sign-up.
Prefer a spreadsheet? Download the Excel workbook: the same pack on eight sheets, from the cover to the size chart, How to Measure and bill of materials.

In this guide
- The nine pages at a glance
- How to tell a real example from a template
- How this pack was made
- The pack, page by page
- Before you send any tech pack, check these
- What a finished pack shows that a blank template doesn't
- What this pack leaves open
- Frequently asked questions
The nine pages at a glance
| Page | What it shows |
|---|---|
| 1 | Cover: style name, number, date, status and version |
| 2 | Overview: style details, colourway, main materials, front and back flats |
| 3 | Photoreal mockup |
| 4 | Flats with 11 numbered call outs |
| 5 | 14 construction notes, grouped by area |
| 6 | Size chart: 21 points of measure, XS to 3XL, with tolerances |
| 7 | How to Measure: every point drawn on the flats |
| 8 and 9 | Bill of materials: fabrics, trims, thread, labels, packaging |
The garment is a unisex pullover hoodie in a regular fit with a dropped shoulder: a lined two-panel hood with a flat drawcord through metal eyelets, a kangaroo pocket, and 1x1 rib cuffs and hem band, in a 340 gsm brushed-back fleece of 80% cotton and 20% polyester.
We chose a hoodie because it's the first product for so many new brands, and because it's easy to leave details out. A sketch shows a hood, a pocket and rib cuffs. It doesn't say how deep the hood is, how tight the cuffs are, where the pocket sits or which grey the rib is dyed to. Those are the details that come back wrong on a first sample: a hood that won't cover the head, cuffs that slide down the wrist, or rib a shade off the body.
How to tell a real example from a template
Plenty of "examples" are templates with a few cells filled in. You can tell the difference by asking whether the pack could actually be sampled and quoted. Six things give it away:
- It names the exact garment. "Pullover hoodie, regular fit, unisex" is something a factory can quote. "Top" isn't.
- The fabric has a weight and a composition. Two fleeces can both be called "cotton fleece" and differ by 100 gsm, which changes how the hoodie hangs and what it costs.
- Every measurement has a tolerance. "Chest 58 cm" is a target. "Chest 58 cm, plus or minus 1" is something a sample can pass or fail.
- Each drawing points at an instruction. Numbered call outs on the flats tie a detail to a note saying how it's built.
- Every page shows its version, date and status. Otherwise nobody can tell whether it's the current file.
- It says what's still undecided. At the first sample, lab dips, fit and costing are all still open. A pack that claims everything is settled hasn't been looked at closely.
We'll use these as we go through the hoodie pack. If any of the terms are new, our glossary of clothing manufacturing terms explains them.
How this pack was made
We sketched the hoodie in clothink, made a photoreal mockup from the sketch, and ran Auto-Complete on the style. In about two and a half minutes it drafted every section: the materials, a 21-point size chart graded across seven sizes, the How to Measure lines, 14 construction notes with call outs on the flats, and the bill of materials. It also suggested details such as stay tape on the shoulder seams and interfacing behind the eyelets, which we kept after review.
We reviewed and edited the draft before export, as you should with any first draft, whoever writes it. For a step-by-step guide to that workflow, see what is an AI tech pack.
The pack, page by page
A factory rarely reads a pack front to back. The sample room goes to the flats and construction, the buyer to the bill of materials, quality control to the size chart. So each page has to make sense on its own.
Pages 1 and 2: Cover and overview
The cover carries the style name and number, the date, the status (Proto) and the version. A factory working on dozens of styles uses these to make sure it's sewing from the current file, not last week's.

The overview puts the essentials on one page: product type, fit, gender, size range, colourway and the three main materials with their placements, with the front and back flats underneath.

Page 3: Mockup
The mockup is how everyone agrees what "finished" looks like before a sample exists. The buyer, the founder and the sample room can point at the same picture: how heavy the fleece looks, how the hood stands, how long the drawcords hang and how deep the rib bands are. It shows how the design should look. It doesn't prove fit or construction.

Page 4: Flats with call outs
Technical flats are front and back line drawings of the garment. Numbered call outs point at each detail that needs an instruction: the lined hood and its centre-back seam, the eyelets and drawcord channel, the hood crossover at the centre front neck, the kangaroo pocket, the dropped-shoulder armholes, the underarm seams, and the rib cuffs and hem band.

We checked every pin against the drawing before export, so each number points at the detail its note describes.
Page 5: Construction notes
This is the page the sample room sews from. The notes cover the hood, the drawcord channel, the pocket, the armholes, the cuffs and hem band, the back neck tape and the labels. Stitch types are named by their ISO numbers, such as 514 for a four-thread overlock and 406 for a two-needle cover stitch. That narrows the room for interpretation, though seam allowances, stitch density and finishing still need agreeing with the factory. Here's one note in full:
C07 Kangaroo pocket: Centre the pocket on the front body, clear of the side seams. Turn under the top and side edges and attach with two-needle 406 cover stitch. Leave the bottom edge raw and catch it into the hem band seam. Bartack both ends of each hand opening.
On this hoodie, we designed the pocket's bottom edge to be caught into the hem band seam. Some kangaroo pockets are finished above the rib instead, so it's a detail worth stating. It's also an example of why the review matters: Auto-Complete's draft said to turn under all of the pocket's edges, the way a patch pocket is built, and we changed it to match this design.

Pages 2 and 8: Fabric and colour
The main fabric is specified properly: brushed-back fleece, 80% cotton and 20% polyester, 340 gsm, pre-shrunk, with an anti-pill finish. "Cotton fleece" isn't a specification: two fleeces can differ in weight, handle and shrinkage enough to change how the hoodie hangs. The rib is listed as a separate material, because it needs elastane to recover after stretching, and both are specified in the same heather grey so the factory knows they have to match.
Page 6: Size chart
Each point of measure (POM) is a defined place where the finished garment is measured. This pack has 21, graded from base size M across XS to 3XL, and each has a tolerance: how far a sample can be off before it counts as wrong. These are illustrative specifications for this hoodie, not recommended sizing for every brand.
Widths are measured flat, across the front. So a 58 cm chest means a finished chest circumference of about 116 cm, and a grade of 2.5 cm a size on the flat measurement adds about 5 cm to the circumference.
| Point of measure | Base size M (cm) | Tolerance (cm) | Grade per size (cm) |
|---|---|---|---|
| Chest, 2.5 cm below the armhole | 58 | ±1 | 2.5 |
| Length from high point shoulder | 71 | ±1 | 2 |
| Sleeve from shoulder seam | 61 | ±0.75 | 1 |
| Neck width | 20 | ±0.5 | 0.5 |
| Hood height, laid flat | 37 | ±0.75 | 0.5 |
| Hem width, relaxed | 47 | ±1 | 2.5 |
| Hem width, extended | 56 | ±1 | 2.5 |
| Hem band height | 7 | ±0.25 | 0 |
| Cuff height | 6.5 | ±0.25 | 0 |

The tolerance is the part first-time packs most often leave out. Without it, the factory applies its own, and you have no agreed basis for rejecting a sample that's "close enough". For more on grading and tolerances, see our guide to the clothing size chart for production.
Page 7: How to Measure
A size chart only works if the factory measures each point exactly as you do. This page draws every measurement line on the front and back flats, with a letter that matches the size chart. When a sample comes back and the chest looks wrong, it tells you whether the hoodie is wrong or the tape was in a different place.

Check that every line starts and ends at the right seam or edge. Here the chest and bicep lines sit 2.5 cm below the armhole, as the size chart says, and the hood is measured laid flat from the neck seam.
Pages 8 and 9: Bill of materials
The bill of materials (BOM) lists every material in the hoodie with its placement. A factory reads it to order materials and work out the price, so vague lines turn straight into vague quotes.
| Material | Placement | Specification |
|---|---|---|
| Main fabric | Body, sleeves, hood (both layers), pocket | Brushed-back fleece, 80% cotton 20% polyester, 340 gsm, heather grey |
| Ribbing | Cuffs and hem band | 1x1 rib, 95% cotton 5% elastane, 420 gsm, heather grey |
| Neck tape | Inside back neck | Cotton herringbone twill tape, 10 mm |
| Drawcord | Hood channel | Flat braided cotton, 8 mm, 120 cm finished length, clear aglets |
| Eyelets | Hood front | Two-part metal eyelets with washers, 8 mm inner diameter |
| Thread | All seams | Tex 27 overlock and cover stitch thread, Tex 40 lockstitch thread |
| Labels | Centre back neck and left side seam | Woven main and size labels, printed care and composition label |
| Packaging | Finished garment | Clear LDPE polybag, 35 x 45 cm, with suffocation warning |


Before you send any tech pack, check these
Whoever writes a tech pack, a person or AI, someone should check it before it goes to a factory. These are the checks that matter most on a hoodie like this one:
- The construction notes describe your design. Here the kangaroo pocket's bottom edge is caught into the hem band seam. Without that instruction, the factory may use a different pocket construction.
- Stitch types suit the fabric and the construction. The joining seams on this hoodie use four-thread overlock (514). Two-needle cover stitch (406) is used where the hem band, armholes and pocket need a topstitch that stretches. The construction notes say which stitch each operation uses.
- Trims work together. The 8 mm drawcord has to pass through 8 mm eyelets. Check the cord, aglets and eyelets together on a physical trim sample.
- Labels are in the bill of materials. Clothing sold in Great Britain and the EU must be labelled with its fibre content (see the UK government's textile labelling guidance), and the factory needs each label's placement.
- Stretch fabrics are measured both ways. A rib band reads differently at rest and stretched, so the hem has two lines. The stretched figure only works if everyone stretches the rib the same way, so agree a repeatable method with the factory, such as the extension tool or tension they use.
- The numbers suit your fit. We've specified a 20 cm neck width as a starting point for this regular fit, to be confirmed at the first fitting. Treat every measurement the same way.
clothink's Auto-Complete gets you a complete first draft to work from. These checks are where your judgement approves the product.
What a finished pack shows that a blank template doesn't
A template gives every garment the same rows: "Fabric: ______", "Pocket: ______". It's a useful reminder of which sections exist, and it gives a team a shared layout. What it can't show you is what belongs in each row for your garment: that this fleece needs a separate rib with elastane, that the pocket is caught into the hem band, that the hem is measured both relaxed and stretched.
That's what an example is for. If you're deciding how to build your own pack, we compare both routes in tech pack template vs tech pack software, and our guide to tech pack mistakes that cause sample problems covers what goes wrong when details are left out.
What this pack leaves open
This is a prototype pack, built to get a first sample and a quote. Some decisions are rightly still open, and they're marked as open rather than guessed:
- Lab dips. The heather grey has to match across the fleece, the rib and the drawcord, approved on real fabric before bulk.
- Trims. The drawcord, its aglets and the eyelets are checked together on a physical sample before they're approved.
- Seam details. Seam allowances and stitch density are agreed with the factory.
- Fabric testing. Shrinkage, pilling and colourfastness limits are agreed with the factory or a test lab once the fleece is sourced.
- Fit approval. These measurements are the starting point. They'll change after the first fit session.
- Costing. The factory's quote fills this in. The bill of materials is what makes that quote accurate.
A tech pack moves from quote-ready, to sample-ready, to bulk-ready. For what a factory needs at the first of those stages, see how to write a tech pack factories will quote from.
Draft a tech pack for your own garment
Upload a sketch, flat or mockup and Auto-Complete drafts the pack for you to review. The Free plan lets you make and edit up to 3 active tech packs, and your first Auto-Complete run is free. Downloading the PDF or Excel needs a paid plan or a £15 one-off unlock for that pack.
Frequently asked questions
What does a completed clothing tech pack look like?
Usually a landscape PDF of several pages: a cover and overview, mockups, front and back flats with numbered call outs, construction notes, a size chart with tolerances, measuring instructions and a bill of materials. The hoodie pack in this guide is nine pages, and every page is shown above.
Can I download this hoodie tech pack example?
Yes. The full nine-page PDF and the matching Excel workbook are free to download from the top of this guide, with no sign-up. It's a reference for one illustrative hoodie at prototype stage, so use it to see how a pack is filled in rather than as a specification for your own garment.
Is this tech pack ready to send to a manufacturer?
It's ready to send for a first sample and a quote. It isn't approved for bulk production: lab dips, trim checks, fabric testing and fit approval are still open, as every prototype pack's are.
Does every clothing tech pack need nine pages?
No. The page count follows the garment. A plain T-shirt needs fewer pages, and a lined jacket needs more. Aim for every decision to be written down once, in the right place.
What's the difference between a tech pack example and a blank template?
A template shows the sections and empty fields. An example shows what belongs in them for one real garment: the fabric composition and weight, the points of measure and tolerances, the construction methods, and the trims and labels with their placement.
Can AI make a tech pack on its own?
AI can draft one. clothink's Auto-Complete drafted every section of this pack in one run. Someone who knows garment construction should still review every pack, AI-drafted or not, before it goes to a factory, using checks like the ones in this guide.